|
|
 Posted 3/11/2014 5:16:54 PM Posted 3/11/2014 5:16:54 PM |
|
|
Junior Member
 
Last Login: 11/18/2015 2:24:13 PM
Posts: 65,
Visits: 309
|
|
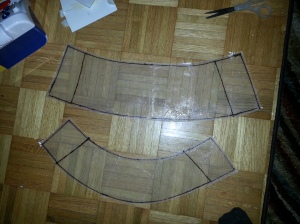
I'm about to begin the Chest Plate/"Gas" Tank/Engine Cover. First I'm going to make it with just the nice rounded surfaces, then go back and cut and add the bump out sections for the shock, front of the seat etc. First thing I did was make a model in Blender3d, of a shape that looks pretty good, and fits my desired dimensions. Then from that I cut off the end edges, layed them flat, sized them for printing on paper, and made some templates. I'm gonna cut these out of plywood, and then bend fiberglass sheets over them similar to how I made a few similarly shaped pieces in my scale Sherman Tank build.


Here's the front transmission cover I did on the tank in a similar manner:
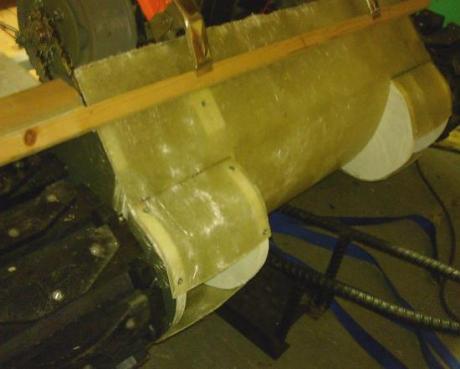
At least this is how I PLAN on doing it, we'll see what really ends up happening as I go.
|
|
|
|
| Posted 4/1/2014 3:16:02 PM |
|
|
Junior Member
Last Login: 11/18/2015 2:24:13 PM
Posts: 65,
Visits: 309
|
|
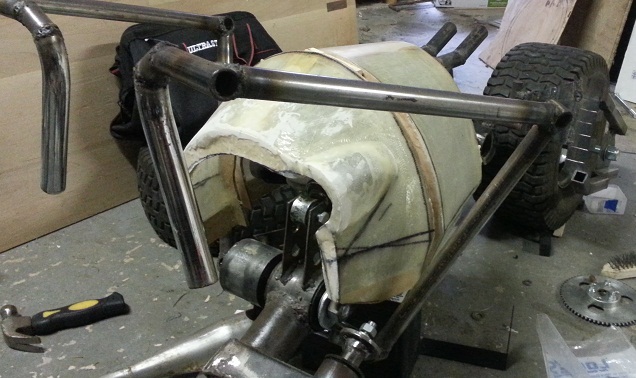
Still chippin away at the engine cover. So far so good. Figuring out now how I'll attach it to the frame, then I'll begin the final body filler, smoothing etc.


|
|
|
|
| Posted 4/1/2014 5:44:37 PM |
|
|
Junior Member
Last Login: 11/18/2015 2:24:13 PM
Posts: 65,
Visits: 309
|
|
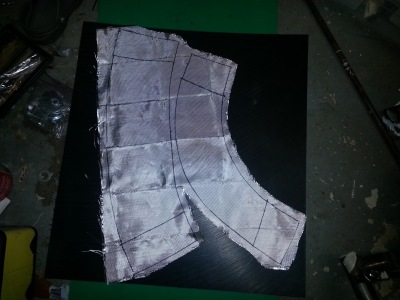
Here are the few steps before that, making the skelton and the fiberglass sheet pieces. The cloth is layed onto a piece of black UHMW, then resin drizzled on them. Not shown was ths paper template steps, but I just rolled the skeleton along a big piece of paper tracing the outside edges as one would expect.


|
|
|
|
| Posted 4/1/2014 7:09:25 PM |
|
|

Forum Guru
Last Login: 10/10/2023 2:34:08 PM
Posts: 506,
Visits: 8,329
|
|
Nice process. Im yet to get to this part so your build log is giving me plenty of different techniques to consider. 
www.spidey4fun.com
|
|
|
|
| Posted 4/4/2014 6:03:54 PM |
|
|
Junior Member
Last Login: 11/18/2015 2:24:13 PM
Posts: 65,
Visits: 309
|
|
Thanks Spidey, may not be the best way out there to do it, but it's working well for me, and is pretty cost effective.
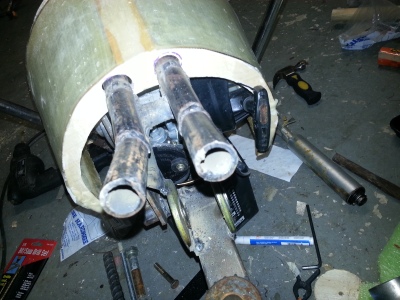
Here you can see how I'm supporting the rear of the engine cover, so it can support weight when the rider lays on it, by having it slide on over the front of the seat supports. You can also see how nicely the engine's pull-start cord/handle tucks in there and is hard to see, yet is in a pretty good place to easily get to it, and start the engine. Sometimes we get lucky.

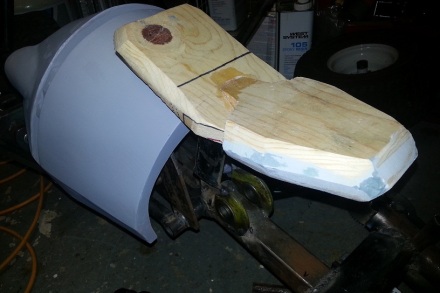
I also started mocking up the seat. I'll start making the wood version next with all the detailed edges etc, to later make a mold of.

|
|
|
|
| Posted 4/13/2014 10:10:29 PM |
|
|
Junior Member
Last Login: 11/18/2015 2:24:13 PM
Posts: 65,
Visits: 309
|
|
Still chipping away at smoothness and those pesky sharpbody lines on the engine cover, trying to get them just right. I built up the lines with thickened epoxy, sanded them close, then now am doing the final shaping and smoothing with body filler.


|
|
|
|
| Posted 4/14/2014 2:37:14 AM |
|
|
Forum Guru
Last Login: 10/10/2023 2:34:08 PM
Posts: 506,
Visits: 8,329
|
|
Looking good.
www.spidey4fun.com
|
|
|
|
| Posted 4/21/2014 1:46:19 PM |
|
|
Junior Member
Last Login: 11/18/2015 2:24:13 PM
Posts: 65,
Visits: 309
|
|
Getting a few things closer to being ready to finish. Cut the rear hub shaft to length and left a piece on the end which acts as a key on the inside of the sprocket. This is nice as it keeps everything aligned when I do the other keyway, and set screw etc.

More smoothing of the engine cover:

Began making the wood version of the seat:

AND to kinda see how it's all fitting together...

Still more smoothing of the engine cover, but you can see it's pretty close, just a few pitted areas left. And need to still mount it onto the frame. The seat is getting more pieces added to it, then a couple days of sanding it just right before it's ready to take a mold of.
|
|
|
|
| Posted 4/23/2014 3:58:33 PM |
|
|
Junior Member
Last Login: 11/18/2015 2:24:13 PM
Posts: 65,
Visits: 309
|
|
Here's a little more seat work, showing it next to the one I'm using as reference, and how the build is shaping up. Engine cover is still just primer color, and will have a little more smoothing done before final paint. But I'm gonna wait to worry about that until later in the final paint stages.


|
|
|
|
| Posted 4/28/2014 3:09:52 PM |
|
|
Junior Member
Last Login: 11/18/2015 2:24:13 PM
Posts: 65,
Visits: 309
|
|
Sprayed some primer, and started trying to dial in the rear hub and drive system. I ran the chain through the tubes (not pictured), and will be cutting the chain to length soon, and I guess I'll just hope and prey it's a good chain tension, since I don't have a way of tightening it


|
|
|
|