|
|
 Posted 2/26/2014 2:00:49 AM Posted 2/26/2014 2:00:49 AM |
|
|

Has NO LIFE!!

Last Login: 12/26/2023 1:14:45 PM
Posts: 5,397,
Visits: 4,909
|
|
| Hey travbowls, nice build keep up the good work. Love the pics....BWD
|
|
|
|
| Posted 2/26/2014 2:01:01 PM |
|
|
Junior Member

Last Login: 11/18/2015 2:24:13 PM
Posts: 65,
Visits: 309
|
|
Thanks Dave, not exactly the quality if your builds, but definitely one of the funnest projects I've ever worked on 
I'm working on the steering linkages right now, looks like I need a real ball-joint type of tie rod end where the front tie-rod attaches to the steering shaft, my DIY ones don't work with the angles required.. but mine should work for the other 3. Also did a rider test fit before I finish the grip ends of the handlebars, looks like he should be able to reach ok. This also shows reference of the scale a little better..


|
|
|
|
| Posted 3/1/2014 6:26:57 PM |
|
|
Junior Member
Last Login: 11/18/2015 2:24:13 PM
Posts: 65,
Visits: 309
|
|
So I'm working on the linkage from the handlebars to steering shaft. Here's my problem, if it is one. I made this black UHMW piece to slide on and keep the shaft centered etc.

Then I welded a nut on the back of the level arm, put a lock washer and nut on each side, and tightened it all down. It seems to not loosen either nut when I turn, but just seems like it could loosen one over time. Hmm. Trying to think of a way to make it so they can't back off. Pretty small rod to drill a hole in for a cotter pin, but I guess that's possible. I can't weld anything to the all-thread shaft, or else the UHMW piece would not slide over.

|
|
|
|
| Posted 3/3/2014 9:47:25 PM |
|
|
Junior Member
Last Login: 11/18/2015 2:24:13 PM
Posts: 65,
Visits: 309
|
|
Here's my steering test vid. Still need to adjust the lengths of the tie-rods for even turning radius either direction, and so the wheel is straight when the bars are straight etc, but overall seems to work good. Even with lock washers on both side of the lever arm nut on the end of the steering rod, it does start to loosen up (which you can sort of see as the video goes on). I think I have a plan of attack though to solve this, which I'll cover later.
http://www.youtube.com/watch?v=41Hk0VDpUQY
|
|
|
|
| Posted 3/4/2014 1:40:58 AM |
|
|

Forum Guru
Last Login: 10/10/2023 2:34:08 PM
Posts: 506,
Visits: 8,329
|
|
Looks good.
www.spidey4fun.com
|
|
|
|
| Posted 3/5/2014 1:03:47 PM |
|
|
Junior Member
Last Login: 11/18/2015 2:24:13 PM
Posts: 65,
Visits: 309
|
|
So here's the steering rod solution I came up with. I drilled out the black plastic piece to have a bigger hole, so that the steering rod could have a nut welded to it and still fit through (feeding it from the bottom->up). Then I welded a socket to the back of the lever arm which fits over the nut.

I also started working on the seat structure. They are a little too high and far forward in this pic, but you get the idea.

Question for the experts out there: Does anyone know of a reasonable DIY method for making a mold to make something out of solid rubber? I'd like to cast the seat out of rubber and have it slide over these seat frame rails. The only other option I can think of would be to make a normal foam type seat and seat pan, and cover the seat with inner tube rubber. I'd gladly take any ideas. Thanks
|
|
|
|
| Posted 3/5/2014 3:27:01 PM |
|
|
Has NO LIFE!!
Last Login: 12/4/2023 11:08:55 PM
Posts: 3,232,
Visits: 5,166
|
|
| Hey travbowls, Most would carve and sand a master out of wood, foam, or wax. Then they would make a box out of wood, big enough to hold the carved master with a few inches extra. Then cut the box into two halves. Holes are then drilled into the box for 1/4' wooden dowls to firmly support the carved master. Pouring funnel shape is attached to the master as are a few rods for the escape of air. With the master secured, plaster of paris or similar material is slowly poured around the carved master up to a dividing line. Let this dry throughly then coat the edge with wax or other similar material so the top part won't stick to the lower part. Now pour plaster over and around the master until it is a few inches above the master. Let this dry throughly. Seperate and remove your carved master with the attached funnel shape and rods. The opening left by the funnel shape is for pouring in the casting mix and the openings left by the rods are to let air escape so you don't have any air voids in your pour. Touch up any rough or damaged areas in your mold. You are then ready to cast. Next buy one of the liquid rubber/or synthetic products, mix with the catalyst and pour into the mold. Let harden and remove from mold. If this is a little confusing you can on online and study sand casting. Sand casting is used for metal but it is similar enough with a few modifications to demonstrate the basic principles of casting. Also you might look up the lost wax process of casting. vertigo
|
|
|
|
| Posted 3/5/2014 5:44:38 PM |
|
|
Junior Member
Last Login: 11/18/2015 2:24:13 PM
Posts: 65,
Visits: 309
|
|
| Cool, thanks! I should definitely consider trying my hand at that style of casting. Some of the guys on the scaled tank forum I am on did similar methods for wheel center caps, etc, where they needed 12/18/or 24 of something. I wonder if some of the other 1:1 BatPods have made a rubber seat, or done a more traditional seat that just looks the same. I'll keep digging. I've also thought about just making it out of wood and then coating it in some of that roll-on bedliner. Just doesn't sound real comfy for the rider. Anyways, i'll quit blabbing, thanks again.
|
|
|
|
| Posted 3/7/2014 12:11:16 AM |
|
|
Junior Member
Last Login: 11/18/2015 2:24:13 PM
Posts: 65,
Visits: 309
|
|
Looks like I could take a page out of BWD's book, do a little cutting and gluing, and have a model to put on there when out on display. Have to get a permit from Batman's owner though, he may not be onboard, haha. Scale is pretty darn close, he's 30" tall. Assuming like a 6'2" batman, that'd be 30/74, or 40%

|
|
|
|
| Posted 3/10/2014 4:50:38 PM |
|
|
Junior Member
Last Login: 11/18/2015 2:24:13 PM
Posts: 65,
Visits: 309
|
|
I finished the handlebar grip ends. I was going to give them more of an angle for a more comfortable grip, but decided he'll be able to ride it when them pretty vertical, so just gave them a slight angle.

Also cut the rear end off an old kids bicycle, and used the pieces for my seat posts, cause I like the way they reduce from oval steel tube to flat steel where Im welding them to the frame (the black pieces with the seat pieces welded to them).

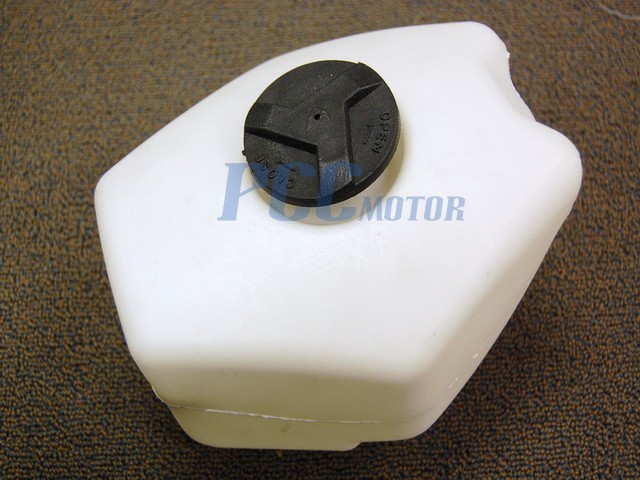
I bought a plastic pocket bike gas tank, but it's too tall, so I'm going to attempt to heat it up with a heat gun, and cave in certain areas until it's closer to the shape I need. If it doesn't work, maybe I'll try some RC Car gas tanks, but I'm hoping this one will work. This is like the one I got:
|
|
|
|